
Window alarms are one of the simplest and most cost-effective ways to boost home security without calling in professionals. Whether you’re protecting against break-ins, monitoring entry points, or adding a layer of detection to an existing system, window alarms offer flexibility and peace of mind. These devices range from basic contact sensors that alert you when a window opens to advanced glass break detectors that respond to the sound of shattering glass. For homeowners tackling DIY security upgrades, understanding how window alarms work and choosing the right type for your needs is the first step toward a more secure home.
Table of Contents
ToggleKey Takeaways
- Window alarms are cost-effective security devices that detect unauthorized entry through contact sensors, glass break detectors, or hybrid systems, making them ideal for DIY home security upgrades.
- Magnetic contact sensors are the most affordable and easiest to install ($10–$40 per unit), while glass break detectors ($25–$100) protect larger windows by identifying the acoustic signature of shattering glass.
- Proper installation of window alarms requires clean surfaces, precise magnet-and-switch alignment at 0.5 inches apart, and strategic placement on ground-floor windows and vulnerable entry points.
- A layered approach combining contact sensors on doors and common windows with glass break detectors on larger panes provides the best balance of detection coverage and false alarm reduction.
- Regular battery maintenance checks every quarter and customized smart settings ensure window alarms remain effective and reduce false alarm fatigue over time.
- Combining window alarms with standard locks and good lighting creates a comprehensive security strategy that deters theft by making your home a harder target.
What Are Window Alarms and How Do They Work
A window alarm is a sensor-based device designed to detect unauthorized entry or tampering at windows. The basic premise is simple: when a window opens or glass breaks, the alarm triggers a sound, sends a notification, or alerts a monitoring service depending on the type you install.
Most window alarms operate using one of two primary mechanisms. Contact sensors use magnets and switches to detect when a window changes position. When the magnetic field is interrupted, meaning the window has opened, the circuit breaks and the alarm activates. Glass break detectors, by contrast, use acoustic technology or shock sensors to identify the high-frequency sound waves or vibrations characteristic of breaking glass. This makes them effective for detecting forced entry even if a window is left slightly ajar.
Standalone alarms are self-contained units that emit a loud siren (typically 100–120 decibels) directly at the point of detection. Hardwired systems integrate with your home’s electrical network and often connect to a central control panel. Smart window alarms link to your phone via Wi-Fi or a hub, sending real-time alerts and sometimes footage if integrated with cameras. Understanding which mechanism matches your home’s layout and your security priorities will guide your purchase and installation decisions.
Types of Window Alarms to Consider
Magnetic Contact Sensors
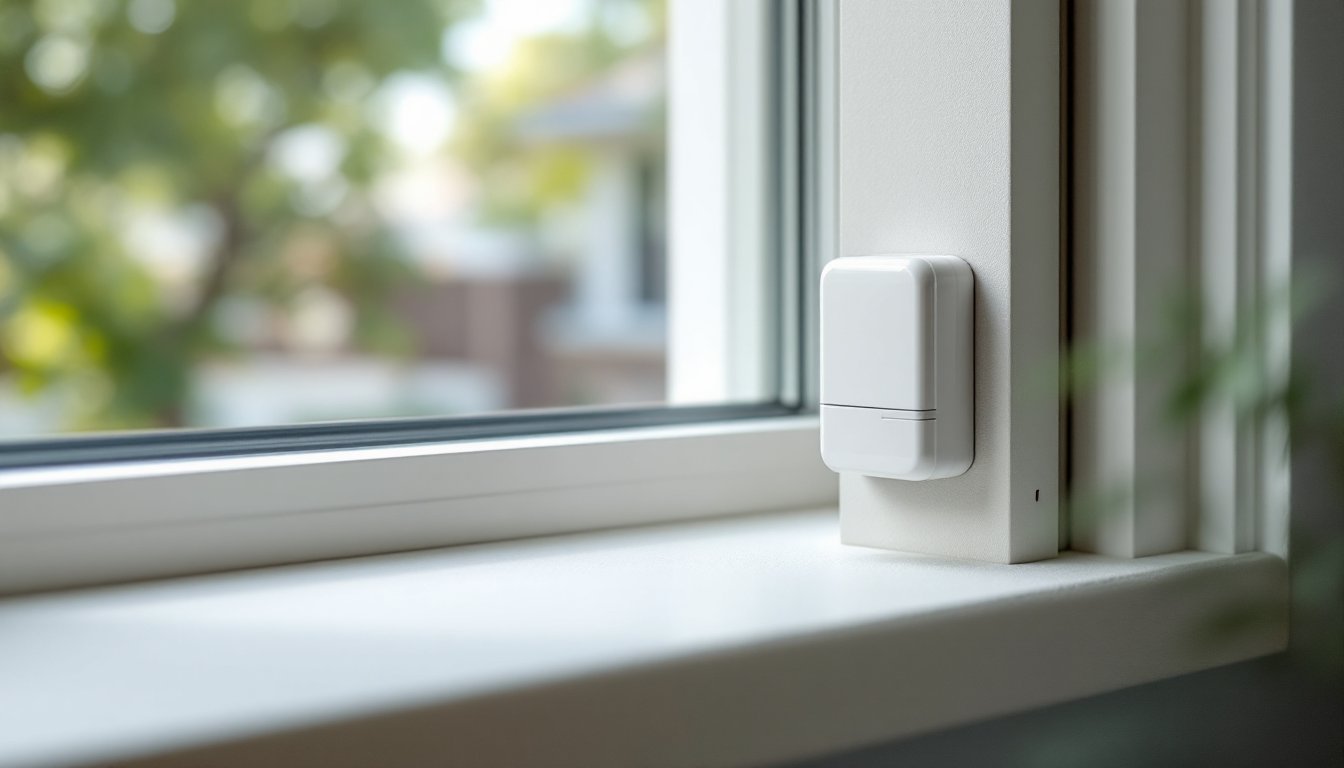
Magnetic contact sensors are the most widely used window alarm type because they’re reliable, affordable, and simple to install. These devices consist of two parts: a switch mounted on the window frame and a magnet mounted on the sash (the movable part of the window). As long as the window stays closed, the magnet keeps the switch in the “closed” position, and no alarm sounds.
When someone opens the window, even slightly, the magnet moves away from the switch, breaking the circuit. That’s when the alarm triggers. Most homeowners can install these in under five minutes per window using adhesive strips or small screws. They’re also the most budget-friendly option, typically running $10–$40 per unit depending on whether they’re standalone, wireless, or smart-enabled.
The main limitation is that contact sensors don’t detect broken glass if the window pane shatters but the frame stays closed. If your windows face a high-risk area or you live in a neighborhood with frequent break-ins, you may want to pair contact sensors with glass break detectors or choose a hybrid system.
Glass Break Detectors
Glass break detectors rely on acoustic sensors to identify the specific sound frequency of breaking glass. When glass shatters, it produces a distinctive high-frequency sound (typically between 8 kHz and 10 kHz) that the detector recognizes and responds to within milliseconds. This makes them invaluable for protecting large window panes, ground-floor rooms, or homes near side streets where thieves might smash and grab.
Glass break detectors come in two primary varieties: acoustic glass break sensors (which listen for the sound) and shock or vibration sensors (which detect the impact). Acoustic models are more sophisticated and less prone to false alarms from dropped objects or loud noises, though they still require careful placement to avoid triggering on nearby traffic or machinery. Shock sensors are simpler and cheaper but may produce occasional false positives.
These detectors typically cost $25–$100 per unit and can cover a wider area than contact sensors (often 20–30 feet of window space). But, they usually require hardwiring or integration with a security hub rather than standing alone. For comprehensive protection, many homeowners combine contact sensors on doors and common entry windows with glass break detectors on larger, more vulnerable windows.
Recent reviews of DIY home security systems highlight that modern sensor combinations offer the best balance of detection coverage and false alarm reduction, making a tiered approach the smartest investment for most homes.
Installation Tips for DIY Window Alarms
Before you crack open a sensor package, measure your windows and create a map of which ones you want to protect. Ground-floor windows, those facing alleys or less-trafficked areas, and windows in master bedrooms should be your priority. Upstairs windows may be lower risk, but don’t skip them entirely, thieves sometimes use second-story access to avoid detection.
Surface Preparation
Sensor installation hinges on clean, dry surfaces. Wipe both the window frame and sash with a damp cloth to remove dust, grime, and old paint residue, then dry thoroughly. If you’re using adhesive strips (the most common approach for renters and those avoiding holes), this prep work is critical, sensors won’t adhere properly to dirty surfaces and may shift over time. For homes you own, small screw-mounted brackets offer maximum stability and are worth the three-minute drill time per unit.
Magnet and Switch Alignment
When installing a contact sensor, the magnet and switch must align parallel and roughly 0.5 inches apart when the window is closed. Misalignment is the number-one cause of false alarms or failed detection. Mark the position lightly with a pencil before peeling back the adhesive backing. If using screws, predrill small holes to avoid splitting the window frame, especially on older wood sashes.
Test the sensor before walking away. Open and close the window slowly while listening for the alarm to trigger at the point of opening. If it doesn’t activate until the window is halfway open, the magnet and switch are too far apart, peel and reposition.
Wireless System Setup
If you’re installing a wireless or smart system, ensure your hub or control panel has a clear line of sight to sensors and sits within the manufacturer’s recommended range (typically 30–100 feet indoors, depending on walls and interference). Metal studs, thick concrete, and older electrical wiring can degrade signal strength. Test connectivity from the room where you’ll be most often, usually the kitchen or living room, to make sure alerts reach your phone reliably.
Power and Battery Maintenance
Battery-powered sensors are convenient but require ongoing attention. Check battery levels quarterly, especially before seasons when you open windows less frequently (windows get opened less often in winter and summer when heating and cooling run). Dead batteries mean no alerts. Keep fresh replacements on hand and mark a calendar reminder for seasonal checks. For hardwired systems, ensure all connections are tight and protect exposed wiring with conduit where it runs through high-traffic areas.
Testing and Documentation
After installation, walk through your home triggering each sensor individually to confirm it’s working. Note which sensors cover which windows and post a simple list near your security hub or phone. This small step pays off if you ever need to troubleshoot a false alarm or explain your setup to emergency responders.
For smart window alarms, explore automation options. Many platforms allow you to arm sensors only at night, silence alerts during the day when you expect window traffic, or trigger notifications but not sirens if you’re home. These settings reduce false alarm fatigue and make the system fit your daily routine. Recent coverage from Digital Trends shows that homeowners who customize settings on their smart sensors are more likely to maintain them long-term and catch real threats faster.
Conclusion
Window alarms are a practical, low-cost investment in home security that homeowners can install in an afternoon without professional help. By combining contact sensors on likely entry points with glass break detectors on vulnerable large windows, you create a layered defense that catches most intrusions. The key is honest assessment of your home’s weak points, careful installation with proper surface prep, and regular maintenance of batteries and settings. A well-installed window alarm system working alongside standard locks and good lighting habits makes your home a harder target, and that’s often enough to deter casual theft.