
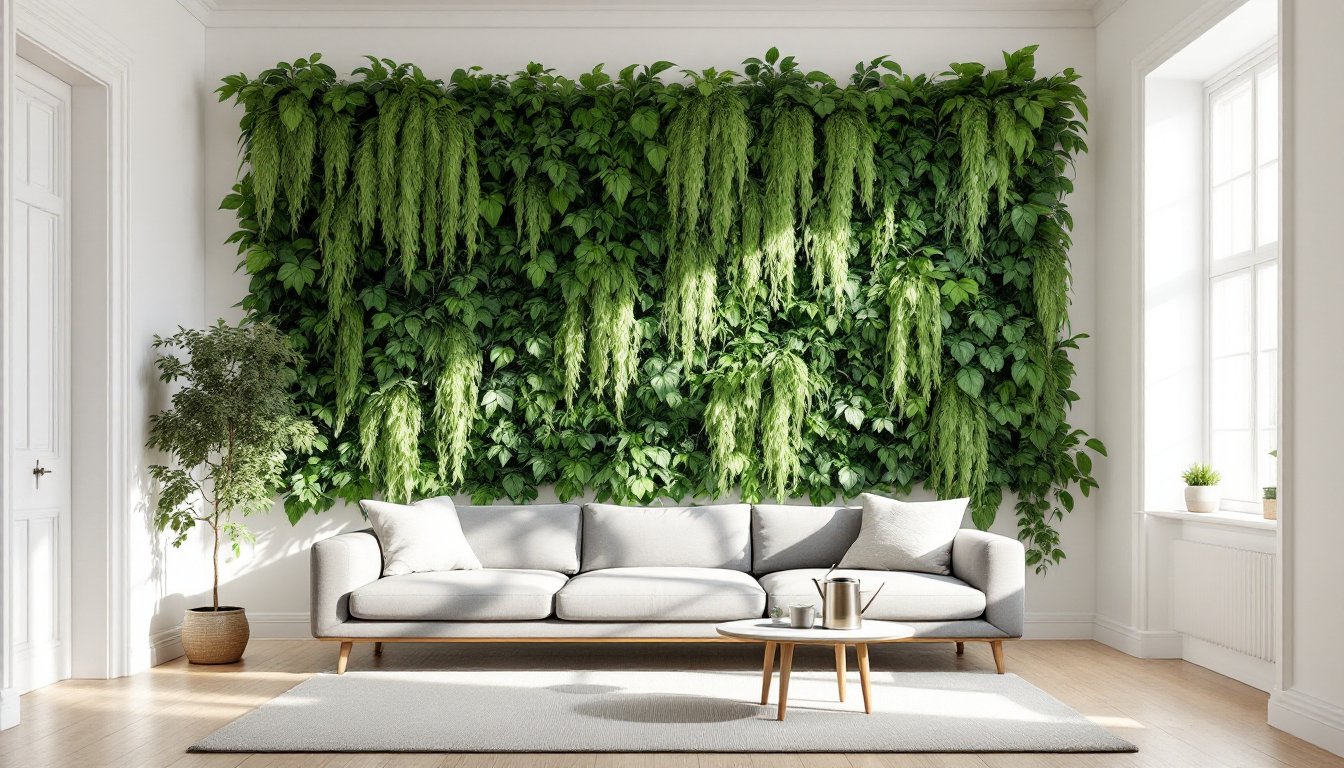
Green wall decor has moved from trendy Instagram backdrop to practical home improvement that actually works. Whether you’re dealing with awkward blank walls, limited floor space, or just want to bring life into a dull corner, green wall decor solves real problems while boosting air quality and visual interest. In 2026, homeowners have more options than ever, from full living wall systems to low-maintenance faux greenery that looks surprisingly authentic. The good news? You don’t need a landscape architect or deep pockets to pull this off. Let’s walk through what’s involved, what styles work best, and how to install and maintain a green wall that actually thrives.
Table of Contents
ToggleKey Takeaways
- Green wall decor solves practical problems like maximizing growing space in small rooms while improving air quality and creating an intentional focal point without eating up floor area.
- Living wall systems with real plants offer air-filtering benefits and thermal regulation but require consistent light, water, and drainage planning—plan for 20-30 minutes of weekly maintenance.
- Faux greenery walls eliminate watering and light requirements, making them ideal for dark corners or low-maintenance spaces, though high-quality UV-resistant options are essential to avoid a cheap appearance.
- Proper installation demands moisture-resistant backing, careful weight distribution (soil-based systems weigh 5-15 lbs per sq. ft.), and a drip tray system to protect drywall from water damage.
- Plant selection should match your wall’s light conditions—sun-loving succulents for bright spaces, pothos and philodendrons for medium light, and shade-tolerant ferns for low-light interiors.
- Green wall decor doesn’t require professional installation or permits for most homeowners; honest prep work, proper plant-to-light matching, and a realistic maintenance schedule are the keys to long-term success.
What Is Green Wall Decor and Why It Matters
Green wall decor is exactly what it sounds like, covering a vertical wall surface with plants or plant-like materials. The difference between a green wall and casually hanging a few potted plants is structure, scale, and intention. A proper green wall system uses a backing frame, pocket system, or modular planters that support multiple plants in a dense, cohesive arrangement.
Why does this matter beyond aesthetics? Living walls improve air quality by filtering carbon dioxide and releasing oxygen. They also provide acoustic dampening, reduce wall surface temperature (helpful in warm climates), and create a focal point that makes a space feel intentional. From a practical standpoint, a green wall maximizes growing space without eating up floor area, critical if you’re working with a small bedroom, apartment, or office nook.
The catch? Not all green walls are created equal. A true living wall system with real plants requires light, water, drainage planning, and ongoing care. Faux versions eliminate the maintenance but sacrifice the air-filtering benefits and require careful material selection so they don’t look cheap. Most homeowners land somewhere in the middle: a living wall in a well-lit spot, or faux greenery in a darker corner where real plants would struggle.
Popular Green Wall Styles to Match Your Home
Living Wall Systems and Vertical Gardens
Living wall systems come in several flavors. Modular panel systems use pre-made frames (usually 12″ × 12″ to 24″ × 24″) filled with soil or growing medium, stacked or arranged on a wall. These are rigid, stackable, and work well if you want uniform appearance. Pocket systems use a fabric backing with sewn-in pockets: plants slide in from the front, and water drains down through. These feel softer visually and are easier to retrofit onto existing walls.
Hydroponic or water-rooted systems skip soil entirely. Plants are suspended in a lightweight growing medium (like rockwool or expanded clay) and water circulates from a reservoir at the base. These are lower-weight than soil-based systems and ideal if you’re worried about water damage to drywall. A simple water-rooted setup can be assembled from basic materials if you’re handy, many DIYers use fishing line or dowels to suspend trailing plants like pothos or philodendron in a frame, then hand-water or use a drip line.
The tradeoff: soil-based living walls are more forgiving because the soil holds moisture and nutrients, but they’re heavier (plan for roughly 5-15 lbs per sq. ft. depending on moisture content). Water-rooted systems are lighter and less messy but demand consistent attention to water levels and quality.
Faux Greenery Walls for Low-Maintenance Appeal
Modern faux greenery isn’t your grandmother’s plastic ivy. High-quality UV-resistant artificial plants now come in subtle colorations and leaf textures that hold up indoors for years. The big advantage: zero watering, pruning, or light requirements. This makes faux greenery ideal for hallways, bathrooms, or dark interior walls where live plants won’t thrive.
Faux walls come as individual panel systems (interlocking squares of greenery, usually 20″ × 20″) or as bulk rolls of greenery mat that you cut and arrange. Installation is straightforward: level-check your wall, attach a backing frame if needed, and secure panels with panel adhesive or screws. The main pitfall is going too dense or using obviously plastic-looking varieties. Mixing faux with occasional real trailing plants (suspended in front or integrated into pockets) creates a hybrid look that feels fuller and more natural.
Step-by-Step Guide to Installing a Green Wall
Before you commit, assess your wall. Is it load-bearing? (If you’re adding 10+ lbs per sq. ft. in soil and water, the answer matters.) Does it get direct sunlight, or is it mostly indirect/low light? Will water drainage be an issue, or can condensation drip into a tray below?
For a soil-based living wall:
- Prepare the wall. Clean it, patch any holes, and prime with a moisture-resistant primer. This step is non-negotiable if water will be present.
- Install a backing layer. Mount ½” plywood or moisture-resistant composite board using lag bolts into studs (16″ on center). This distributes weight and protects drywall.
- Attach your frame or pocket system according to manufacturer specs. Level check. If using a pocket system, ensure the top edge is slightly higher than the bottom so water drains downward, not into wall cavities.
- Add a drip tray along the base, a simple aluminum channel or plastic gutter catches runoff and guides it to a drain or collection point.
- Fill pockets or planters with lightweight potting mix (avoid heavy garden soil: it compacts and blocks drainage).
- Plant densely with trailing or cascading varieties for a full look. Succulents work for sunny walls: shade-tolerant ferns or pothos for low-light spots.
- Install irrigation if you’re serious about consistency. A simple battery-operated drip timer and small-diameter tubing beats hand-watering and is less likely to cause over-water damage.
For a faux greenery panel system:
- Clean and level the wall. Fill any holes: cracks aren’t critical, but a rough surface is.
- Install mounting strips or a backing frame. Panel systems need a solid surface, furring strips (thin wooden strips) create a level mounting plane if your wall is uneven.
- Snap chalk lines to keep panels straight as you work.
- Attach panels using construction adhesive or stainless steel screws (if you plan to replace panels later). Overlap slightly at edges so no backing shows.
- Blend transition areas. Use individual plant stems or trailing ivy pieces to soften edges and fill gaps.
Neither style requires a permit in most jurisdictions unless you’re doing heavy structural work or the wall is in a rented space (check your lease). If you’re unsure about load capacity, a structural engineer can confirm in an hour or two.
Choosing the Right Plants and Materials
Plant selection makes or breaks a living wall. Your choices depend on light and humidity. In a bright, south-facing space, you can grow sun-loving trailing succulents like Sedum or Echeveria. These tolerate sporadic water and don’t need daily attention. In an east- or west-facing window with morning or afternoon sun, Pothos, Philodendron, or Peperomia thrive: they’re forgiving, grow fast, and look full quickly.
For low-light interiors, Ferns, Syngonium, and shade-loving Philodendron varieties are your friends. They’re slower growers but nearly bulletproof if kept consistently moist (not soggy). Mix plant types, combine trailing varieties with upright or rosette plants for texture variation.
Material-wise, lightweight potting mixes are critical. Standard topsoil is too heavy and compacts, blocking water flow. Look for mixes labeled “lightweight,” often containing perlite, bark, or coir. For hydroponics, expanded clay pellets or rockwool work well and are reusable. If using faux plants, check resources like The Spruce for UV-rated varieties: cheap plastic fades fast, especially near windows.
For backing and irrigation, stainless steel or vinyl-coated hardware resists rust in moist conditions. Avoid galvanized steel or uncoated wood without sealing. If you’re hand-watering, a watering wand with a fine mist head beats pouring from a pitcher, you’ll hit plants accurately without soaking the wall.
Maintenance Tips to Keep Your Green Wall Thriving
Living walls are not “set it and forget it.” Plan 20-30 minutes per week for upkeep. Watering is the biggest variable. Soil-based systems dry faster than you’d think because vertical walls drain quickly and have high surface area exposed to air. Check soil moisture at the top and middle of the wall: water when the top inch feels dry. In summer, that might be 2-3 times per week: in winter, once. Overwatering is the #1 killer, soggy soil causes root rot and algae blooms.
For hydroponic systems, change or top-up water every 1-2 weeks depending on evaporation. Watch for algae (a sign of excess light + stagnant water) and prevent it by using opaque tubing and cleaning the reservoir regularly.
Lighting matters. If natural light is insufficient, install a grow light 6-12″ above the wall. A simple full-spectrum LED panel (3-5 watts per square foot of wall) keeps most houseplants happy for 12-14 hours daily. Faux greenery doesn’t need light, but direct, prolonged UV can fade it, consider UV-blocking window film if the wall’s in bright sun.
Pruning and plant rotation keep walls looking dense. Pinch back trailing stems as they get leggy: this encourages branching. Every 6-12 months, rotate or swap in new plants if some are lagging. Faux panels may collect dust, vacuum gently with a soft brush attachment or use a compressed-air duster monthly. A simple DIY living wall with water-rooted plants can reduce watering complexity if you’re willing to refresh water regularly.
Pest management: Indoor walls occasionally attract spider mites or mealybugs. Check plants every few weeks for sticky residue or webbing. Isolate affected plants and treat with neem oil or insecticidal soap, don’t spray the entire wall without testing first, as it can stain backing material. Most indoor green walls are far less pest-prone than outdoor gardens, so this is rarely a major issue.
Final Thoughts
Green wall decor transforms a blank wall into a dynamic, living focal point without demanding professional installation or a bottomless budget. Start with a small living wall in a well-lit spot if you want the full air-cleaning benefits, or go faux in a tough-to-light corner where you want zero maintenance. Either way, the key is honest prep work, the right plant-to-light match, and a realistic maintenance plan. Build it properly the first time, and your green wall will be a talking point for years.