
A shower remodel can feel like an overwhelming undertaking, but it doesn’t require a general contractor and a six-month timeline. Many homeowners tackle DIY shower remodeling projects by breaking the work into manageable phases, planning, demolition, waterproofing, fixture installation, and finishing touches. This guide walks through the essentials, from understanding your current setup to completing your space safely and within budget. Whether you’re refreshing tile, upgrading the showerhead, or doing a full gut renovation, the key is honest assessment of your skill level and knowing when to call a professional.
Table of Contents
ToggleKey Takeaways
- A DIY shower remodel breaks into five phases—planning, demolition, waterproofing, fixture installation, and finishing—and costs range from $500 for cosmetic updates to over $10,000 for full structural overhauls depending on scope and materials.
- Waterproofing with cement board, mesh tape, and modern membranes like Schluter systems is non-negotiable to prevent hidden leaks that damage studs, so proper substrate preparation directly determines long-term success.
- Assessing water damage, soft drywall, and loose tile before starting reveals whether your shower remodel is cosmetic or structural—structural work requires licensed professionals to ensure code compliance and safe drainage.
- Tile selection and layout planning (accounting for thin slivers, slip resistance of 0.60+, and consistent grout lines) matter as much as installation technique, so use spacers, start at the bottom, and choose forgiving tile profiles for your first project.
- Always consult local building departments for permit requirements since unpermitted structural or plumbing work can affect home resale and insurance, while cosmetic updates may skip permits entirely.
- Know when to call a professional—rough-in plumbing, asbestos testing, structural repairs, and waterproofing assessments are worth the $500 consultation cost to avoid thousands in water damage repairs.
Plan Your Shower Remodel: Budget, Design, and Permit Requirements
Start by answering three questions: What’s your realistic budget? What do you want to change? And do you need permits?
Budget planning requires honest numbers. A basic cosmetic refresh (new caulk, fresh grout, updated fixtures) might run $500–$2,000. A mid-range remodel with new tile, waterproofing, and plumbing adjustments typically costs $3,000–$8,000. A full structural overhaul with custom tile work and new shower pans can exceed $10,000. These estimates vary heavily by region, material grade, and whether you’re handling labor yourself. Check local remodeling cost guides to benchmark expectations for your area.
Design decisions shape the scope. Are you changing the shower footprint, or just the finishes? Moving plumbing or electrical lines significantly increases complexity and cost. Stick to the existing footprint for your first remodel: moving rough-ins (water supply, drain, and vent lines) requires knowledge of code, proper slope, and often a licensed plumber.
Permits matter. Many jurisdictions require permits for any structural work, plumbing, or electrical changes. Cosmetic updates (re-tiling, caulk, hardware) sometimes don’t require permits, but check your local building department first. This isn’t red tape, it ensures proper ventilation, drainage, and structural safety. Unpermitted work can affect home resale and insurance claims. Always ask: “Is this cosmetic or structural?” Structural work belongs with licensed professionals.
Assess Your Current Shower and Identify What Needs Replacing
Before you swing a hammer, spend a full shower cycle observing what you actually use and what doesn’t work. Look for water damage behind tile, soft drywall, discoloration, or mold indicates failed waterproofing. Press on tile and grout to feel for looseness. Check the shower pan for cracks or low spots where water pools instead of draining.
Common problem areas: failing caulk at corners (allows water behind walls), cracked or missing grout (lets moisture seep into substrate), rusted valve trim rings, and loose fixtures. These clues tell you whether you’re fixing surface issues or tackling underlying water damage.
Water damage is the real cost driver. If drywall or framing is soft or moldy, you’re not just replacing tile, you’re removing affected structure, treating it, and rebuilding. That’s a scope change requiring professional assessment. If the substrate (usually cement board or greenboard) is solid and dry, you’re ready to proceed with confidence.
Draw a simple sketch noting: fixture locations, existing plumbing access, ventilation fan location, and problem zones. This sketch becomes your reference during demolition and helps you spot surprises before they stall the project.
Prepare Your Space: Demolition and Waterproofing Basics
Demolition is dusty, messy, and dangerous without proper setup. Wear a dust mask (N95 or P100), safety glasses, and work gloves. Asbestos was common in tile, grout, and pipe insulation before the 1980s, if your shower was built before 1990, have suspect materials tested before disturbing them. Disturbing asbestos releases harmful fibers and requires professional abatement.
Remove old tile by chipping it out with a cold chisel and hammer or renting a tile removal tool. Expect 8–16 hours for a standard shower surround. Remove the old shower pan (typically mortar and liner) down to studs and rim joist. Haul debris in durable bags, it’s heavy and sharp.
Once exposed, inspect the framing. Studs should be solid: joists beneath the pan should support weight without flex. If you find rot or soft spots, stop and consult a structural engineer or contractor.
Waterproofing is non-negotiable. Install cement board (not drywall) behind tile areas: it resists moisture. Tape seams with alkali-resistant mesh tape and thin-set mortar. For the shower pan, you have two paths: a traditional pre-formed pan (faster, less skill required) or a sloped mortar bed with a liquid or sheet membrane (more control, higher skill). Modern sheet membranes like Schluter or Wedi boards simplify this, they unfold, seal with compatible tape, and require less slope math than traditional methods. Apply the membrane per product instructions, overlapping seams generously. This step prevents the hidden leaks that destroy studs years later.
Install Fixtures and Finishes: Walls, Flooring, and Features
With waterproofing set, rough-in plumbing and electrical if needed. Valve body, supply lines, and drain assembly install before tile goes on. If you’re inexperienced with solder joints or PEX crimp fittings, have a plumber handle this, leaks in rough-in are expensive to fix once walls are closed.
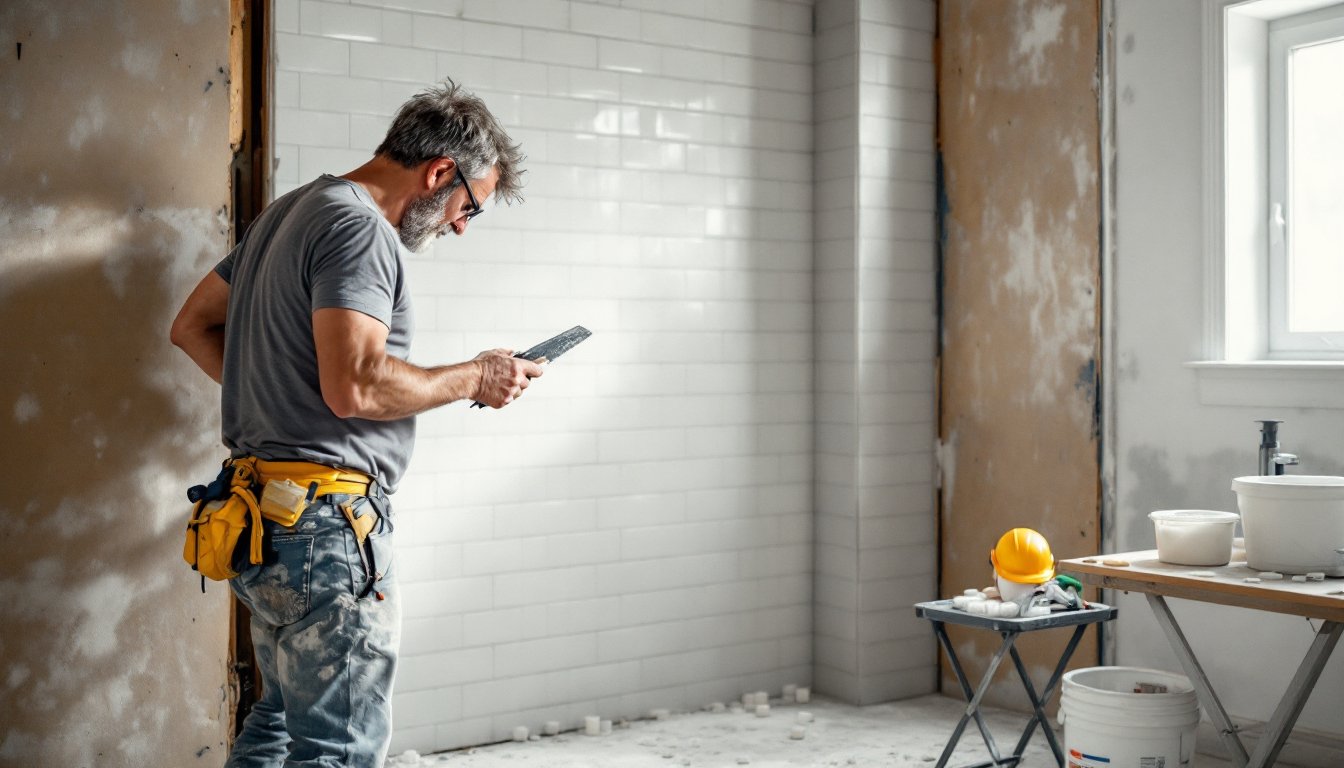
Now comes the visible work: tiling. Measure carefully and plan layout so you avoid thin slivers at edges. Use a notched trowel (typically 1/2″ or 5/8″ for wall tile) to apply thin-set mortar to the substrate. Butter the back of each tile too for full coverage. Press firmly, using a level to check plumb and plane. Grout lines vary (typically 1/16″ for large format, up to 3/16″ for classic subway tile): narrower lines look sleeker and hide imperfections less, so choose based on the tile size and your skill level.
Let thin-set cure per product specifications (usually 24 hours) before grouting. Mix grout to a peanut-butter consistency and pack it into joints with a grout float held at 45°. After 15–20 minutes, wipe diagonal passes with a damp sponge to strike joints and remove excess. Grout takes 72 hours to fully cure: keep the shower dry during this window.
Tile Selection and Installation Techniques
Tile choice affects both difficulty and appearance. Porcelain tile is durable and water-resistant: ceramic is cheaper but softer. Large-format tile (12″ × 24″) looks modern but requires perfect substrate and grout lines are less forgiving. Subway tile (3″ × 6″) is classic and forgiving of minor substrate imperfections. Small mosaic tile hides substrate issues but requires meticulous grouting.
Slippery floors are a safety risk. Matte-finish or textured tile provides better grip than polished. Check the slip-resistance rating (Coefficient of Friction): for shower floors, aim for 0.60 or higher. Install budget-friendly tile options strategically, a blend of premium tile in focal areas and modest tile elsewhere keeps costs down without sacrificing appeal.
Installation technique matters. On walls, start at the bottom and work up, using tile spacers for consistent joints. On floors, lay out your pattern dry first so you know where cuts fall. A wet saw produces clean cuts, though renting one costs $40–$80 per day. Angle cuts (miters) for trim pieces need a wet saw and steady hands. For your first project, choose tile profiles that need minimal cutting.
Complete Your Project: Finishing Touches and Safety Checks
Once grout is cured, caulk (not grout) corners, inside angles, and where tile meets the surround. Caulk flexes slightly, preventing cracks from house settlement and humidity changes. Use 100% silicone caulk for wet areas, it outlasts acrylic and resists mold better. Apply a bead, smooth with a wet finger, and let it cure per the tube (usually 24 hours).
Install trim pieces: a threshold or curb at the shower entry, grab bars if needed, and towel bars or shelving. Grab bars are smart safety additions, especially if the shower will be used by older adults or children. They must anchor into studs or blocking, not just drywall or tile. Standard placement is 33–36 inches above the finished floor.
Check ventilation. Bathroom fans should run 20 minutes after each shower to remove moisture. If you don’t have a fan or it’s inadequate, a new ductless fan or inline fan vented outdoors is a worthwhile upgrade. Poor ventilation leads to mold and long-term damage.
Final safety checks: Ensure the showerhead is secure, the valve operates smoothly, and the drain flows quickly. Test water temperature, verify the mixing valve prevents excessively hot water (usually a 120°F limit is standard). Look for cracks in grout or caulk: small gaps now grow into leaks. Run a full shower test and observe for leaks around fixtures, at seams, and on floors outside the surround. Many small leaks become visible only after water sits or during morning condensation.
Your DIY shower remodel succeeds on two foundations: meticulous prep and honest assessment of when to hire help. Home renovation guides and local building departments are free resources, use them. A $500 consultation with a plumber or waterproofing specialist saves thousands in water damage repair. This isn’t failure: it’s smart building.